Temperature & Humidity Sensor Series
In condition monitoring systems, temperature and humidity sensors measure ambient air conditions to ensure safe operating environments for equipment.
Sean Foley, Global Business Manager, Wireless, demonstrates the configuration and some of the features of this IO-Link sensor.
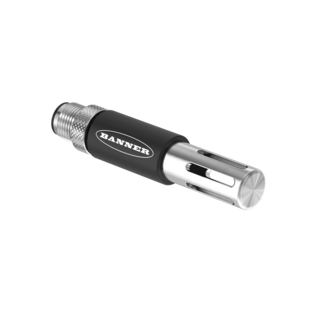
So in this video we're going to be covering the new S15S-TH-KQ Temperature and Humidity sensor.
So this is an IO-Link device, and it monitors the temperature, humidity and dew point of the environment that it's installed in.
So in this demo we're going to show you how to configure the device, and a couple things about the sensor.
So here we have it connected to an IO-Link master, the DXMR90-4K IO-Link Master.
And via that IO-Link master, we’re connected to our PC via an Ethernet cordset.
An interesting thing about this sensor is the ability for it to discrete, turn on a discrete output on the sensor itself, on pin 2, which is the white wire.
So what we have here is a K50 light that could be actuated via that discrete output on pin 2 on that white wire that's connected to the IO-Link device.
So we're going to show you how to configure this.
We're also going to dive into how to set up the alarm thresholds, how to read in the configuration of the device in the IO-Link configuration software.
So let's dive into that. So as you can see here we've got a DXMR90-4K, the new IO-Link temperature and humidity sensor, we have our light connected; and it's all connected via a parallel wired splitter.
So first let's cover how to configure the sensor.
The first thing you're going to want to do is download the IO-Link configuration software on the Banner Engineering website.
It can be found under the tab called ‘Software’ on the Banner Engineering website, and it is free to download.
Once it's downloaded, we're going to click ‘Connect.’
We're going to select ‘Ethernet’ because we're connected to an Ethernet IO-Link master; and then we're going to hit ‘Scan.’
The subnet to scan will be 192.168.0, as this is the default IP address of the device.
Out of the box, the DXMR90-4K has an IP address of 192.168.0.1.
Then let's click ‘Go’. We'll be able to find the IP address here for the IO-Link device, or IO-Link Master, the DXMR90-4K; and we're just going to click ‘Confirm’ and then ‘Connect.’
So a nice feature about our IO-Link software, is that it automatically goes to IODD finder via an API to automatically recognize the device that's connected to the IO-Link master, and install the IODD file for the IO-Link device automatically.
As you could see, I already have the IO-Link IODD file installed for the temperature humidity sensor.
If you want to do this manually, you could go to ‘Load IODD’ here, and you could download the IODD files for all of Banner's IO-Link devices on the Banner website. Usually this is not necessary though, as the API allows you to search for the IODD automatically; it makes it very hands off.
So let's go into the IO-Link device and look at our parameters.
To read the configuration of the IO-Link device, we're going to select ‘Read Parameters.’
If we go to ‘Process Data Mode’, here's where we could select if we want to read the temperature values in Fahrenheit or in Celsius.
So we can select different Smart Sensor Profiles for reading the values in Celsius or Fahrenheit.
So if I go over to ‘Process Data’ tab, I could see the temperature values, the dew point values, and the relative humidity values coming in.
If I wanted to read these values in Celsius, I'd simply select this as a Smart Sensor Profile, Celsius.
What we could also do is do a ‘Floating Point’ process data mode for Fahrenheit and Celsius.
By writing this to the sensor, we’ll be able to read the ‘Process Data’ scaled in the ‘Process Data IN.’
And as you can see in this room, currently it's 74.3F.
Another thing that's unique about this sensor is that we could program it to have a discrete output on the white wire (pin 2) when a certain threshold is exceeded on the temperature value, the humidity value, or the dew point value.
So if we go to ‘Alarm Configuration’, we could set those thresholds for that discrete output to turn on,
on the sensor, to turn on, or actuate that light that we have connected.
So in this case I'm going to select a High Threshold’ of 60 degrees.
We're above 60 degrees in this room right now, so that discrete output is going to turn on, as you could see via the light.
What we could also do on the sensor, if you want to turn the device to factory default settings, you could do an application reset.
This will restore the sensor to factory default settings while retaining communication to the IO-Link master.
And this is what I typically recommend for setting the device to factory default settings.
If you select ‘Back-to-box’, that will restore the device back to factory default settings, but you will lose communication to the IO-Link device.
If you have any questions on this device, feel free to reach out to us at bannerengineering.com.
Thanks very much.