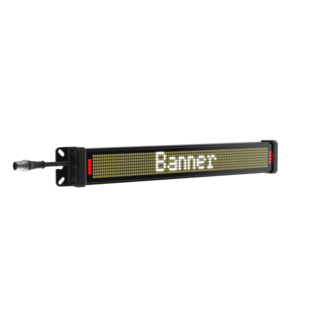
Pantalla de Estado del SD50
Mediante texto fácilmente configurable y LED multicolores, la pantalla de estado SD50 comunica de forma rápida y clara información vital donde más se necesita.
Watch this video to learn how to use the SD50 Status Display in Counter Mode, using Pro-Editor software
In this video, I'm going to be explaining how to use the SD50 Status Display in Counter mode, using Pro Editor.
So from the starting page we're going to choose the Counter mode tile.
Then we have an array of different facets we can change.
So the first is how many pulses we want to go to.
I'm going to leave this at 10 pulses and I'm going to have the direction be Up.
So every pulse on the line, it's going to count up from 0 to 10.
For my Control Input Function, I'm going to have that be Reset, so I can have a wire that resets the count.
Bar Graph Orientation I'm going to have at 3; and if you hover over that you can see it fills graph from 3 to 1, which on this side of the screen it shows you which edge is 3 and 1.
I'm going to click Display Bar Graph so we do get that indication.
I'm going to leave Bar Graph Only unchecked so we can see our display text and data labels.
And I'm going to leave off Display Level as Time, which sets the count to seconds and minutes format.
For the Data Label I am going to put this to pieces since this is a count; and my value I'm going to have as pcs.
When there's not text in the display text area, then on the display it's going to show the Data Label, the count number, and then the Value Label.
So I want that to show up in my middle two thresholds, So I'm going to leave these blank in the middle two.
When we start the count, I'm going to put Start on the display.
And right as we're finishing the count I'm going to write Complete on the display.
For the LEDs on the inside of the display, I can set the animations and colors.
So for the Start animation, I'm going to have a Steady Green.
Once we get up to the next threshold, I'm going to have a Steady Yellow on the side LEDs.
For the next animation, I'm actually going to do an Intensity Sweep Red to let the operator know that we're nearing the end of the count, and then I'm going to have a Steady Red at the end with the Complete on the display.
For my different values, I'm going to change the percentages.
I did some quick math here, but you can also hover over the percentage value and it'll show you the number of pulses that represents.
So when we're at 0 pulses, I'm going to be at my start.
And that will go all the way to 80% which is at 8 pulses.
And then I'm going to be at 95%, which is up to 10 pulses, and have that very last pulse be this Steady Red animation.
So I'm going to click Write to write to the device.
If at any point you want to use these same settings and configuration, you can click the Demo Settings button and it will load everything I just changed here.
Now I'm going to disconnect the SD50 from Pro Editor and connect into my control device.
So first I put power on the brown wire to turn it on.
So now we can see we're at the first state that just says Start.
I start to increment the count by pulsing the white wire.
So now you can see that it says 1 piece and is starting to display a bar graph.
I pulse a couple more times to go through the different settings and still show the data label and value.
And then once we get past eight pulses and it turns to flashing red or intensity
sweep red in order to show that we are nearing the end of our sequence.
And then once I hit ten pulses, we get steady red LEDs and the Complete display text.
If at any point I want to reset this, I can pulse the black wire and I'm back to my start.
This has been a configuration demonstration for the SD50 Status Display.
Check out our other SD50 demo videos for additional control modes.